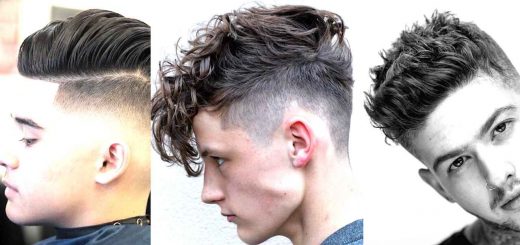
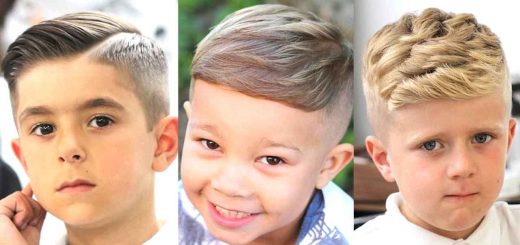
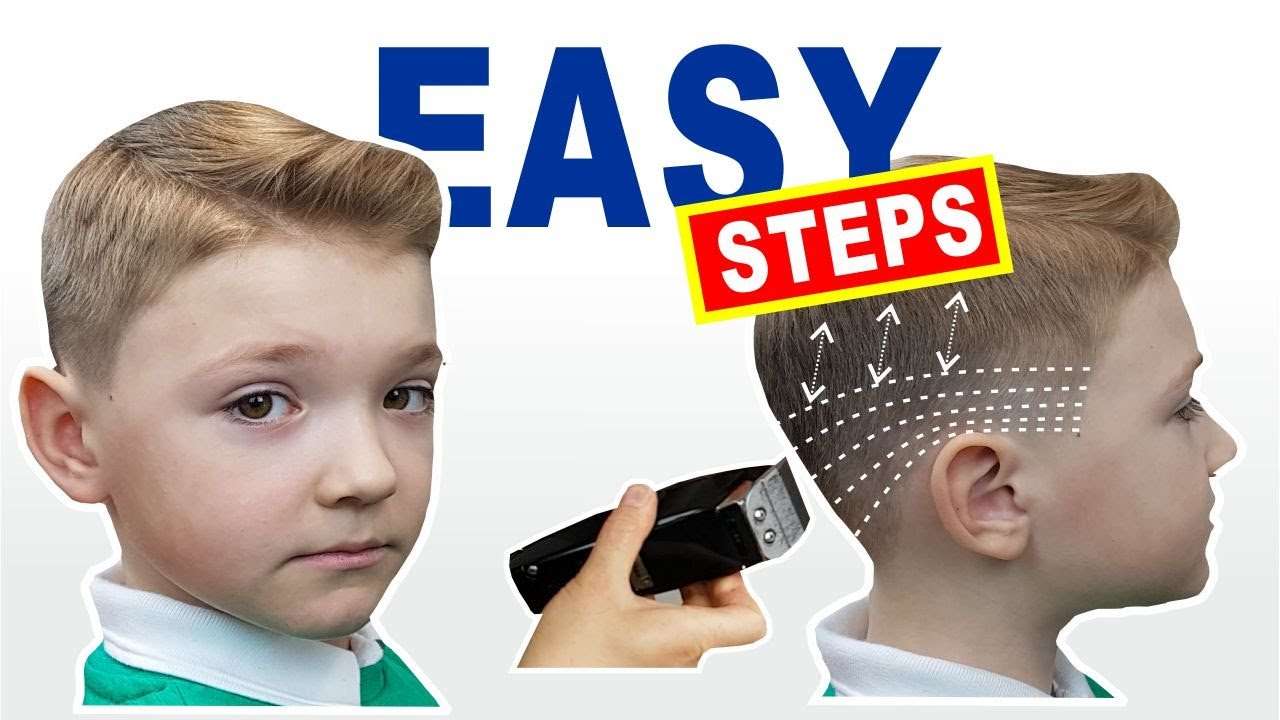
Young Boys Haircut Tutorial | How to Cut Boys Hair at Home
Young Boys Haircut Tutorial | How to Cut Boys Hair at Home
Step one
Start with number three guard at the sides and back. Start from the side on a temple area about 2 inches above the Top of the ear. Going up and fading out, don’t go too high, leave room for blending. Work your way up to the acetyl bone or the line where the head begins to curve. Keep the consistent technique, all the way around the head, always go against the natural direction of the hair growth. As this will produce a nice cut.
Don’t forget to keep the hair dry. As wet. Hair is nearly impossible to cut properly with Clippers when you reach the other side of the head to keep the same height about 2 inches above the Top of the ear.
Step two
change your guard to the number two. To get a smooth fade, you will switch to the shorter guards as you move down.
Step three
Same again, working lower than previously blending with the number one clipper attachment, slowly going up and fading out, creating gradual hair cut.
Step four
Working lower than previously, now you will need to switch your Clippers in two 0. 5 blades, pull the handle down to adjust the Clippers, to cut behind the ears, pull the Top of the ear down, you may have to cut at an angle to get the hair behind the ear. Repeat the same shaving technique as before, starting at the bottom and moving up. Keep your hand into fading out motion and work carefully as your Clippers have no guard protection.
Step five
Adjust the clipper into the closed position as you will fade with the number zero. At the very bottom line, the hair should gradually get shorter as it gets closer to the base of the skull.
Step six
blend the Top into the sides. There are different ways to do this. But today, I will show you the clipper over comb technique start with your comb slightly below the blend line, pointing the comb directly upwards. The hair protruding from the comb will act as a Guide for the desired length, comb upwards till the shorter clipped hair disappears behind the comb, then tilt the comb away from the head, hold your comb still and cut the excess longer hair.
Step seven
Cut the Top section. I’m going to use scissors for the Top section, so make sure to wet the hair, as that will make it much easier to cut. First, you need to cut a guideline. It’s an imaginary line from the forehead to the crown. The center of the head, the length you create here will determine the way you approach the rest of the haircut, cut the hair to the length you want between your index and middle fingers following the natural head shape and moving towards the crown area, leaving the hair a little longer around the crown.
Your guideline is now done, from now on cut in sections next to the guideline to the one side of the head. When starting a new section, always take a little of hair from the previously cut section, as you can see here. This is how you will know the length to cut into the new section.
Move to the other side of the head and repeat the same technique section by section. Make sure to keep the hair wet when using scissors, as it will make it easier to cut.
Step eight
Trim the banks, the hair forward use the point cutting technique in order to get nicely textured banks, positioning the scissors sideways to achieve the proper angled cuts. But remember wet hair shortens as it dries. So be careful not to cut too much.
Step nine
Styling and finishing, firstly be sure to come out all loose hair and trimmings, the hair thoroughly with the hair dryer. If you don’t have a hair dryer, use a towel, finish the look by using your preferred hairstyling product. Thank you so much for watching. I hope you enjoy this haircut tutorial and maybe learn something new. Make sure to leave any questions in the comments below.