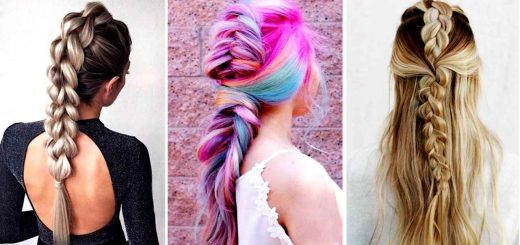
6 Easy Festival Hairstyles To Try
I love festival hair styles so for today’s video I’m bringing you 6 festival hairstyles that you can wear everyday and for any occasion. Since music festival season is my favorite time of the year I thought I’d bring you a festival hair tutorial that allows you to wear these six hairstyles on an every day basis. We’re covering all the braids and accessories to get your hair festival ready and for everyday wear.
Today we’re doing
some festival hairstyles.
You guys know this is
basically my Christmas,
I love festival hairstyles
so I’m very excited to do
these for you guys today.
I personally am not gonna be attending
any music festivals this year
but I will be wearing these hairstyles
because I just love the inspo,
I love any chance to go a
little extra with my hair,
we all know this and
so whether you’re going
to a music festival or not,
I wanted to give you guys
some cool extra moments
for your hair as well.
So let’s get into it.
We’re gonna start off with
this tied up ponytail,
I’m in love with it, spoiler alert
and to point out the obvious,
I am wearing extensions for this one
because I want it to be
like all the way there
but it would also be pretty without them.
So first things first,
you’re going to take
a large section of hair
from each side of your head
leaving just a little bit in the middle
and put that into a ponytail.
Once you have that hair in a ponytail,
you’re gonna go ahead and
tie some cord, leather cord,
chain, whatever you want around it
and then we’re gonna start
pulling back the front.
You’re gonna sweep your hair
from one side over the top
and pin it in place as
many times as you need
and then take the other
side and sweep it across
and pin it in place.
I’m also doing this kind
of half circle motion
as I’m going in and I’m grabbing hair
as I go through the half
circle and then I pin it down
and into the ponytail
and this feels so secure.
Now that everything is pulled back,
I want you to locate your cord again
and you’re going to do a little half knot
across the front of your ponytail.
Once you’ve done that,
crisscross the cords
behind your ponytail, bring
them back to the front,
and do a full knot, so half
knot and then knot it again.
And then just pull apart the hair
between the two little
half knots a little bit
and you are literally done.
That’s the hairstyle,
I feel like it’s one of the
easiest festival hairstyles
I’ve ever done because normally
they’re super elaborate
which you know I love
but I also love something
that can come together super easily.
So heart eyes on this hairstyle.
Up next we have some
warrior braid inspiration.
To start this hairstyle off,
you’re going to section a mohawk section
across your head that’s about
two to three inches wide
and secure the rest of
the hair out of the way.
Then you’re going to Dutch
braid that mohawk section
from the hairline to where a low ponytail
would sit in the back of
your head and as you go,
make sure that you’re taking
as small sections as possible
especially at the beginning,
that’s gonna get you the best results.
(upbeat music)
Now on this side we’re going
to separate just a tiny,
tiny sliver right next to
the mohawk we already did
and you’re going to either
lace or Dutch braid that.
When it’s such a small section
sometimes I just lace braid
because it’s a little bit easier
than trying to pick up
the literal five hairs
on each side of the section.
Now we do the same thing on the other side
so you’re gonna section off
your little sliver of hair,
clip the extra hair out
of the way and Dutch braid
until you hit that low ponytail point
on the back of your head.
Then just braid a couple edges normally
and secure it with a hair clip.
And now I’m going to pull
all the hair together
into a low ponytail leaving
it looped on the last rotation
so it’s a little bit of a chignon.
Now I’m gonna take that
braid in the center
and I’m going to fluff up the back,
I’m not gonna do the top as much
’cause I don’t want it to
be like a pouf situation
but I would like some more
volume throughout the braid.
And to finish off, I’m gonna add some cord
to the little braids on either side.
Cutting a piece of cord that’s about three
to four times longer than the braid,
putting it through a very
dull embroidery needle
and then I am looping it through the hair,
I’m leaving about an inch
of a tail up at the front
and I’m gonna pin that when we’re done.
Once you get to the end of the braid,
you can just kind of
pull the needle right off
and actually leave the
tail of the cord there,
we’re gonna utilize it.
Then up at the front you’re
gonna take that little gold tail
and you’re gonna tuck it
down next to your braid
and pin that in place.
Then repeat on the other side.
So this whole wraparound part
would be a whole lot easier
if you were to get your
hair bestie in on it
like maybe you guys could
like do each other’s hair,
make it a whole thing, just a thought.
Share this video with
them, get them on board,
you will thank me.
Finally I’m going to take
the ends of the gold cord
from the braids and
another piece of gold cord
and wrap it around the elastic
until you can’t see it anymore
and then tie off the ends.
This hairstyle somehow makes
me feel very Daenerys Targaryen
even though she never
wore anything like this,
it’s just very warrior-y
but also I like the
little gold shine in it
and I like that it’s out of your face
so it’s very practical as
well as cute, and fierce.
And for our next hairstyle,
we’re gonna do some bedazzled fun buns.
This hairstyle is actually
in this video today
because a bunch of you guys
requested it on Instagram
after I posted a picture
of my sister wearing it
and everyone wanted to know how to do it.
Also hello, evil twin Kayley here,
my thought was that
Coachella is three days long
so you get three different looks
so I wanted to do three
different looks for this video.
Pretty obviously we’re gonna
start off with a center part,
then on one side you’re gonna start
with a small section of
hair and begin braiding back
to where you want your fun bun to sit.
As I’m doing this, I am leaving out
so much hair around my face
because that’s how I
like to frame my face,
if you prefer to have
everything pulled straight back,
you’re welcome to do that.
Once you hit that place where
you want your bun to sit,
you can braid a couple
more inches normally
and secure it with a bobby pin.
Then I’m grabbing just a touch more hair
and securing that and the
braid into a hair elastic
and you can take the bobby pin out.
And now we repeat the same
thing on the other side.
And now for the fun buns,
if you have a way that
you like to make these,
girl, go for it, I’m just
gonna show you how I do it.
So what I do is I backcomb the hair
to get it nice and fluffy
and then I loop it over once
and pin that in place.
Then I’ll bring the hair
around the base once,
pin that in place,
and then deal with any
ends that I have going on.
So really instead of like
twisting and wrapping
like you typically do,
I do a lot of molding
to get like the perfect fun bun.
And then you’re gonna attempt
to do the same thing on the other side.
Making fun buns matches
the bane of my existence
but I always try to remember
to just do the mirror
image of what I did before.
I flipped it to the right last time,
I’m flipping it to the left this time
and I’m wrapping my hair counterclockwise
whereas it was clockwise on this side,
if that makes any sense, if
you want to care that much,
otherwise you know, sisters,
not twins, who cares?
Well hello, I zoomed you in really close
for the final step in this hairstyle
which is to add rhinestones to the part,
this is obviously optional
but why would you skip it?
So last year I used hair gel to do this,
this year I gave eyelash
glue another chance
and I realized it is the superior option.
So just get a little bit
of eyelash glue on my hand
and then grab your rhinestones
of choice and some tweezers,
dip the rhinestone into the
glue and then onto your scalp.
You will most likely find it easiest
to kind of really accentuate your part
and pull the hair apart as you
place the rhinestones down,
that way they have more scalp to stick to
and they don’t end up sticking
to like one or two random
hairs and kind of floating.
And that is the hairstyle.
(laughs)
This is such an easy to do festival style
and you can style it however you want to,
you could do evil twin Kayley if you want
or you could take it
super bright and happy
and have different colored rhinestones.
You could even do like rainbow rhinestones
but I think even without the rhinestones,
this is a great just summer
hairstyle altogether.
And now for another fully out
of your face braided hairstyle
this one was inspired by
hairbyruslan and blankitinerary,
both their Instagram pages
are great for hair inspo
and I fell so hard in
love with this hairstyle,
I had to do it.
To get started on this hairstyle,
we’re actually gonna section out the part
that’s gonna be braided in the back first.
So I’m going from where
I want my ponytail to sit
to the side of my neck on one side
and then repeating on the other side.
And I’m gonna take all that
hair that I sectioned off
and put it securely into a clip,
making sure that it’s
held really well together.
And then to make my life easier
and secure the rest of the hair,
I’m going to go ahead and put
it up in that high ponytail,
that way the hair is fully out of the way,
it’s not going to sneak
into your braid at all
and you already have that step done.
And then once the ponytail is in,
you can let down the back section
that we’re going to be braiding.
And for that braid, you’re
going to flip your head
fully upside down and
start with a tiny piece
right at the nape of your
neck and begin Dutch braiding,
bringing in as tiny of pieces
as you can as you get started.
After your first couple inches,
you can bring in a couple
more hairs at a time
but if you want that really great
crisp beginning of a braid,
you have to feel like you’re braiding
like 10 hairs at a time.
Once you’ve braided that entire section,
braid a couple of inches normally,
secure it with a bobby
pin and stand back up.
And now you have a ponytail and a braid.
Secure all that with another hair elastic
to make sure everything is super secure.
And you’re gonna wrap the hair into a bun,
any kind of bun you want,
I’m going to make my like egg bun,
it’s a little taller
but I love how it looks,
also I’m only 5’3" and I think I’m always
just trying to get as
many inches as I can.
So I’m gonna hold the hair up
and then wrap the hair around it
kind of like going down the
hair that I’m holding up
and then pin that in place.
At this point you could
leave this hairstyle as is,
I already love how it looks,
I feel like if you’re also
a dancer or an athlete,
this could be a great thing to
throw into your hair routine
but I’m gonna take it
just a little farther
because this is festival.
So I have some cord, I
have just been loving cord
for the past few years for
festivals, don’t at me.
And I’m gonna take about three times
the length of the braid
in cord and snip that off.
And now I’m going to see if I
can get this into the needle.
Come on, you can do it!
(chuckles)
Putting this through a
blunt embroidery needle
and then I’m lacing it
through one side of the braid.
Now you’re just going to tuck the tails
and pin them in place,
on top I’m tucking it under
the bun and pinning it
and on the bottom I’m
cutting off the extra cord
and then tucking it under the
braid and pinning it there.
And that’s it for this hairstyle,
I think this one is really great
especially if you really
want all your hair fully up
and out of the way.
And even though I styled
it a little darker today,
you could absolutely wear
this with a flowy maxi dress
and love it just as much
as I’m loving it right now.
Coachella day three, Kayley is here
and she is ready to turn up.
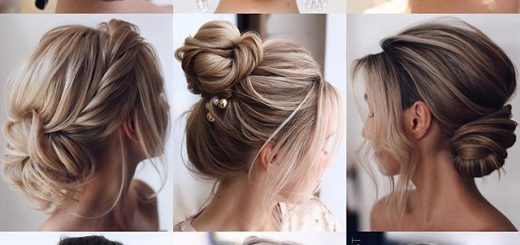
Who’s ready for another updo?
First things first,
I’m going to throw my hair
into a super high ponytail.
Now we’re gonna add some accessories.
This is a little string
of rainbow rhinestones
with bobby pins on either side
so you could pin it in as like a headband
or around the back, you could
wrap it around the ponytail.
I’m gonna do my own thing.
So I’m going to be pinning one of these
into each side of my ponytail,
however the part that’s hanging down
is gonna have a bobby pin attached to it
so I’m gonna cut off the little
bobby pin with a ring on it
and just leave this ring
because I can put a bobby pin
through that again and that
way I’ll still have bobby pins
on each side, I just don’t want
the bobby pin for this one.
And now we have just the end hanging free
and I can go ahead and
pin this into my ponytail.
Let’s pin one on the
other side of my ponytail,
I’m just pinning down into the ponytail,
nothing special here and
now the third and final one.
On this one I’m cutting
off both of the bobby pins
that come on it, remember
we’re leaving the ring
so I can put bobby pins
back on it if I want to.
But right now I don’t want any
and then I’m going to take the end of this
and put it right on my forehead
and straight back across my ponytail.
First thing I’m gonna do is
bobby pin it into the ponytail
and then to help this stay in place,
I’m going to use hair pins.
Now these can go really
easily around the base
of the little wire between the rhinestones
and pin up and into the hair to make sure
everything stays really super well.
See, it’s not going anywhere.
Oh my gosh, I’m so sparkly, I love it.
Now I’m just gonna take
a little piece of hair
and wrap it around the elastic
and the hairstyle will be complete.
And that’s the whole hairstyle,
it’s actually very easy
but it looks super cool,
I love rainbow rhinestones right now,
I think it’s really pretty and this look
is one I would absolutely
wear for a festival.
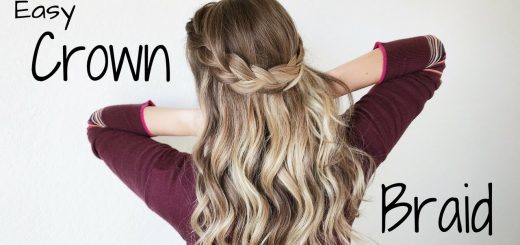
So how about we finish off with one more
half up half down hairstyle?
This hairstyle begins with the center part
which actually goes all the
way down the back of your head
and you’re gonna secure the half
that you’re not gonna work
on first out of the way.
Now for the side you are working on,
we’re gonna start with
a small section of hair
and Dutch braid it back
as if you are going
to Dutch braid this entire section of hair
but you’re gonna stop just above your ear
so it’s like a half up
half down pigtail moment
once you’re all done.
Secure it with an elastic and if you want,
you can pull it apart just a teensy bit,
I’m not gonna fully like fluff this braid
because I want it to look cool,
Coachella, modern, all those things.
And then you repeat the same
thing on the other side.
Now for the elastics, you
can do whatever you want,
you could leave them just plain elastics,
you could be as fancy as you want,
pick your own inspiration and go for it.
I’m going to use a little tiny
hair beater/baby topsy tail,
stick it up and through the elastic,
wrap my hair around the
elastic and pull it through.
And that’s it. And there’s that hairstyle.
I love that it’s kind of ’90s
and a little bit sporty spice.
I feel like I might actually
rock this for day to day
when I’m wearing athleisure,
whatever you’re feeling for
yourself, give it a try.
And that’s it for my
festival hair in 2019,
I hope that you guys enjoyed it.
I had so much fun with this one,
it’s been my first one
since I’ve come back
where I’ve like done the different outfits
and like had a bunch of hairstyles
and I feel like I’m back and I love it,
I hope that you guys enjoyed this,
I hope that you just take these hairstyles
and make them your own.
I kind of like that that was
the accidental outcome of me
wanting to wear multiple outfits,
it’s like every single
one of these outfits
could have worked with every
single one of these looks,
it all comes down to what you like
and how you want to express yourself
and which hairstyles become
a part of that for you.
So I hope you found something
that you like today,
if you did, leave it
in the comments below,
tell me which one was
your favorite hair style
and how you would wear it,
I would really love to hear.
That being said, if you
enjoyed today’s video,
please hit that like button
to help support my channel,
it really means a lot to
me and if you’re new here,
hit that subscribe button to
join the braidholic family
here on Kayley Melissa and all of y’all
can hit that little
bell icon to be notified
when I post a new video
which spoiler alert
is Saturdays for hair tutorials
and Wednesdays for bonus videos
so I hope that you guys
come back and see me then
and I’ll see you in my next video, bye.
(humming)
Four hairstyles down.
Swimming through success.
Hey everyone (coughs)
I don’t know what just happened there,
I think I was trying to swallow
and talk at the same time.
Didn’t go well.
Where are my dragons?